

Why do some LED displays look great, while others always seem to “fall short”? Is the screen not good enough, or is something else not done properly?
Often, the problem isn’t in a single point, but rather in every step from selection and parameter settings to installation, debugging, and the actual usage environment—each step affects the final effect.
If you only focus on “what you bought” and ignore “how to use it and how to adjust it,” even the same batch of LED displays can produce completely different results.
When choosing an LED display screen, many people’s first reaction is to look at the parameters: Is the brightness high enough? Is the resolution fine enough?
But if you think about it from another perspective, the more crucial question is—in what scenario will it be used?
Because different scenarios have completely different “expectations” for display effects.
Indoor and outdoor use are inherently two different logics: one emphasizes detail, the other emphasizes visibility.
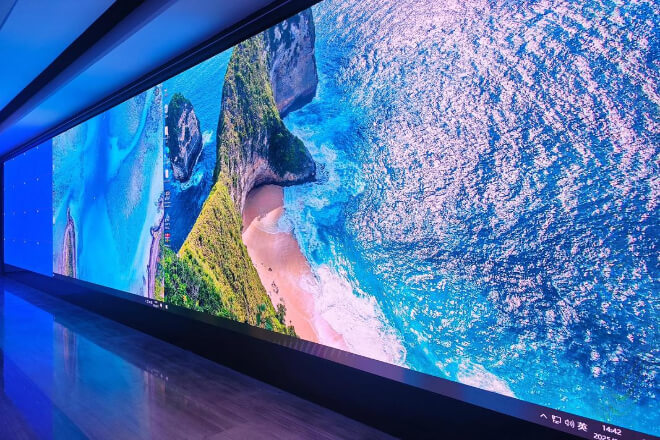
Commercial advertising is more concerned with “whether it can attract attention at first glance,” command centers focus on “whether the information can be seen clearly.
And accurately,” while stage performances are more about pursuing a visual atmosphere.
They may all look like LED displays, but their “tasks” are completely different.
Looking closer, viewing distance and viewing angle are also crucial. At a distance, the image doesn’t need to be particularly detailed; however, when viewed up close, details are magnified.
Similarly, ambient light is very important: in strong light, insufficient brightness renders the content virtually invisible, while in low light, excessive brightness can be uncomfortable to watch.
Therefore, instead of obsessing over parameters from the start, it’s better to first clarify one question: who is this LED display for, and in what environment?
Many technical choices are actually decided the moment the “scenario is determined.”
In LED display projects, a very real problem exists: once the parameters are chosen incorrectly, there’s almost no room for “correction” later.
Therefore, the choice of model and parameters often determines the upper limit of the final effect.
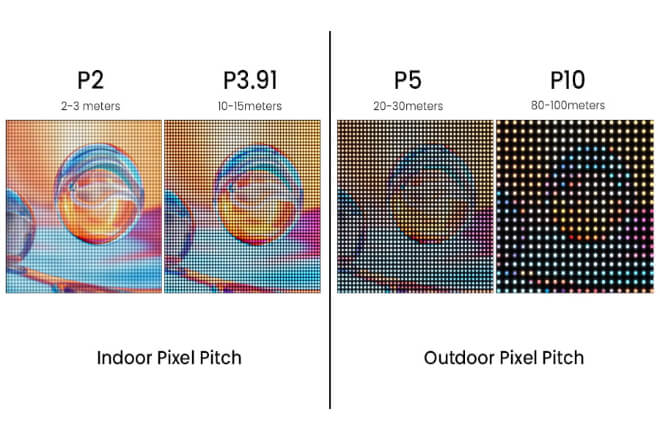
For example, the commonly mentioned pixel pitch (P-value), such as P2, P3, and P10, may seem like just different numbers.
But they correspond to completely different viewing distances and usage scenarios.
Smaller isn’t always better; it’s about “viewing from a distance.” Choosing too small increases costs, while choosing too large results in a less refined image.
Finding this balance is difficult to adjust to later.
Take resolution and screen size as another example. Focusing solely on a single parameter can easily lead to situations where “the screen is large.
But the image is blurry,” or “the resolution is high, but the actual display effect isn’t significantly improved.”
Essentially, these require a holistic approach, not just single-point optimization.
Refresh rate and grayscale level follow a similar logic. A higher refresh rate (e.g., ≥1920Hz or ≥3840Hz) makes the image more stable, especially noticeable during shooting or prolonged viewing.
Grayscale level determines the smoothness of image transitions and whether “color blocks” appear.
These parameters aren’t always immediately apparent, but choosing the wrong one can drastically alter the experience.
Therefore, parameter selection is never about “higher is better,” but rather “whether it perfectly matches the scene.”
Unlike content and brightness, which can be adjusted later, once parameters are determined, they are essentially “locked in.”
Choosing the right option is a plus; choosing the wrong one leaves you with no choice but to passively accept the consequences.
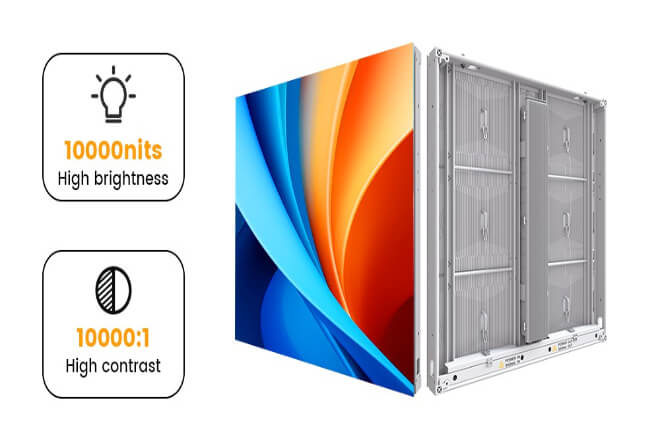
In practical applications of LED displays, brightness and contrast often determine the initial visual impression.
However, many projects fall into a misconception: focusing only on “brightness” while neglecting “comfort.”
In fact, “clear visibility” and “comfortable viewing” are not entirely the same thing.
In outdoor settings, high brightness is a necessity, such as 5000–8000 nits, to ensure content visibility under direct sunlight.
However, using the same brightness indoors can easily become “glaring,” negatively impacting the viewing experience.
Therefore, indoor LED displays require adjustable brightness, rather than simply pursuing high brightness.
This is why more and more projects are introducing automatic brightness adjustment systems.
Using light sensors to adjust the LED display brightness in real time according to changes in ambient light, ensuring the image is always in a “just right” state.
Clearly visible during the day and not glaring at night—this dynamic balance is often more valuable than simply high brightness.
Meanwhile, contrast ratio is equally crucial. Brightness determines “whether you can see it,” while contrast determines “how clearly you can see it.”
Insufficient contrast makes the image appear grayish and lacking in detail; good contrast results in greater depth and detail, and a more impactful visual experience.
Therefore, a truly good LED display is not simply about being “brighter,” but about maintaining both clarity and comfort in different environments.
This requires more precise control, rather than simply stacking a single parameter.

Many people believe that choosing the right LED display will automatically result in good performance.
But the reality is often different—even screens from the same batch can produce vastly different results without calibration and adjustment.
For example, color calibration is a very basic but easily overlooked step. Inadequate white balance and RGB calibration can easily lead to color casts.
Some images may appear reddish, while others may appear bluish, creating an inconsistent look and degrading the overall quality.
For example, brightness uniformity. If the brightness of different modules is inconsistent, uneven brightness will occur, and even if the content itself is good, the effect will be dragged down by “screen issues.”
Module splicing is another typical detail. If the splicing gaps are not handled well, the image will be “cut off” during playback.
Especially in large areas of solid color or dynamic images, where this problem will be more noticeable.
Often, the “low-quality image” perceived by users is actually due to these details not being handled well.
Another common misconception is over-reliance on factory calibration.
While factory calibration can indeed ensure basic consistency, ambient light, installation methods, and even viewing angles will change on-site.
Without on-site secondary calibration, it is difficult to achieve optimal results.
Therefore, the effect of an LED display screen is not only “determined by hardware” but also “determined by calibration.”
The quality of the same screen often depends not on its price but on whether it has been properly calibrated.