How Do We Deal With The “Caterpillar” Failure Of The LED Display?

소개

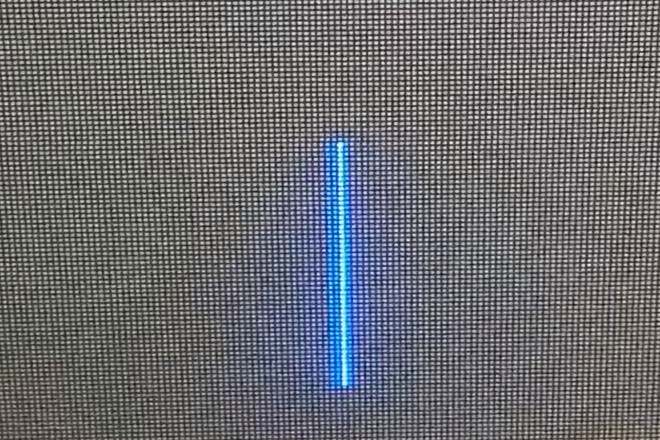
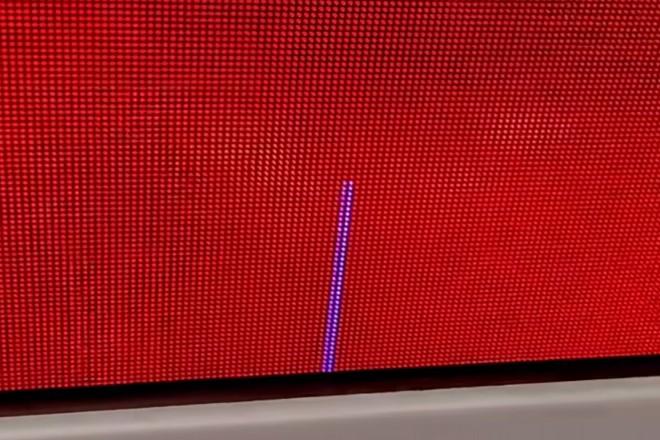
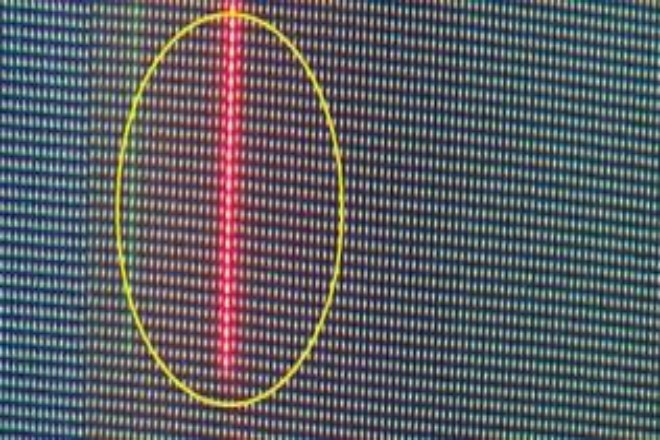
LED 디스플레이, as a shining pearl of modern visual display, is inadvertently troubled by the “caterpillar” failure – those uninvited color blocks and lines on the screen are like uninvited guests that destroy the visual feast. Faced with this challenge, have you ever been helpless and anxious?

Don’t worry; this article will be your right-hand man to solve the “caterpillar” failure of LED displays. From an in-depth analysis of the cause of the failure to a detailed explanation of the treatment steps to practical preventive measures, we will provide you with a set of systematic solutions.

Whether you are a novice in the maintenance of LED displays or an experienced technician, you can find the key to quickly locate the problem and effectively solve it.

1. Analysis of the cause of "caterpillar" failure

Imagine that your LED display suddenly becomes less perfect, and some strange color blocks and lines appear on it. They are like a group of small insects crawling around on the screen, which makes people feel uncomfortable. Where do these “caterpillars” come from? Let’s find the reason together.

1). Data transmission problem: A small episode of the signal on the road

Just like you send a letter to a friend far away, the letter contains what you want to say. However, if the envelope is not sealed well, or it gets wet or wrinkled on the road, the content of the letter may not be clear or even lost.

The data transmission of the LED display is the same. It needs a data line to transmit the signal, which is like the content of the letter.

If the data line is not plugged in well, or the line quality is not good, the signal may have problems during the transmission process. For example, the signal may become weak, just like the letter is wet and the words become blurred.

Or the signal may be lost, just like the letter is lost, your friend can’t receive your words. In this way, some color blocks will appear on the LED display, just like the traces left by the poor signal transmission.

2). Improper scanning mode setting: Chaotic queue of lamp beads

The LED display is composed of countless small lamp beads, which need to light up in a certain order to display the complete image. This order is in the scanning mode.

If the scanning mode is not set properly, it is like when someone cuts in line or goes to the wrong line when queuing, the lamp beads cannot receive the signal synchronously.

In this way, some lamp beads will light up early, some lamp beads will light up late, or even not light up, and some color blocks and lines will appear on the screen, just like the traces left by the chaotic queue of lamp beads.

3). Hardware failure: Strike of components

The LED display is like a complex machine, which is composed of many components, such as lamp beads, driver IC, receiving card, etc. These components are like parts of the machine. If they are broken, the machine cannot work properly.

If the lamp beads, driver IC, or receiving card of the LED display are broken, it is like the parts of the machine are on strike, and there will be problems on the screen.

For example, if the lamp beads are broken, a bright spot or dark spot will appear on the screen; if the driver IC is broken, an area on the screen may not be bright; if the receiving card is broken, a whole row of color blocks may appear on the screen.

4). Software problem: The embarrassment of incompatibility

The LED display requires software to control its display content, brightness, color, etc. However, if the software and the display are incompatible, it will be embarrassing, just like you wear an ill-fitting dress.

If the software and the display are incompatible or the software settings are incorrect, there will be problems on the screen. For example, if the resolution of the software is set too high or too low, blur or color blocks may appear on the screen.

If the refresh rate of the software is set too low, flickering or jamming may occur on the screen.

5). Other factors: Small impact on the environment

In addition to the above reasons, there are some other factors that may also cause “caterpillar” failures in LED displays.

For example, if the pins of the LED lamp beads are damp or contaminated, it is like a person with a cold, and the work is not so smooth, which may cause problems with signal transmission.

In addition, if the LED display screen works for a long time or the working environment is harsh (such as high temperature, high humidity, etc.), some changes may occur inside the lamp beads, such as ion migration, resulting in performance degradation or failure.

This is just like a person who works for a long time or lives in a harsh environment, and the body becomes weak.

So you see, the causes of “caterpillar” failures are not mysterious. They are just like some small problems we encounter in our lives. As long as we understand the reasons, we can solve the problems in a targeted manner and make the LED display screen shine again.

2. "Caterpillar" Failure Handling Steps

When a “caterpillar” failure occurs on your LED display, don’t worry, we can solve it step by step. Next, we will explain the processing steps in detail.

1). Check the data line connection to ensure that the signal is unobstructed

First, we need to check whether the data line between the display and the receiving card is firmly connected. Sometimes, the data line may be loose or poorly plugged, resulting in poor signal transmission.

Then, we can use a multimeter to detect the on-off status of the line. The multimeter is like a super detective, which can help us find out whether there is a poor contact or short circuit in the line.

If the data line is found to have a problem, we can replace it with a high-quality data line or adjust the direction of the line to keep it away from strong electricity or high-frequency equipment to avoid signal interference.

2). Adjust the scanning mode setting to let the lamp beads line up in order

Next, we need to enter the display control system to check whether the current scanning mode setting is correct. The scanning mode is like the queuing rules of the lamp beads. If it is not set properly, the lamp beads will be in chaos, resulting in color blocks on the screen.

We can set the scanning mode correctly according to the technical parameter manual of the display. If you are not sure how to set it, you can contact the manufacturer or technician of the display for help.

In addition, we can also try to change the dynamic scan to the static scan mode to see if the color block problem on the screen can be improved. The static scan mode is relatively more stable, but it may consume more power.

3). Detect hardware failures and find out the parts that are out of service

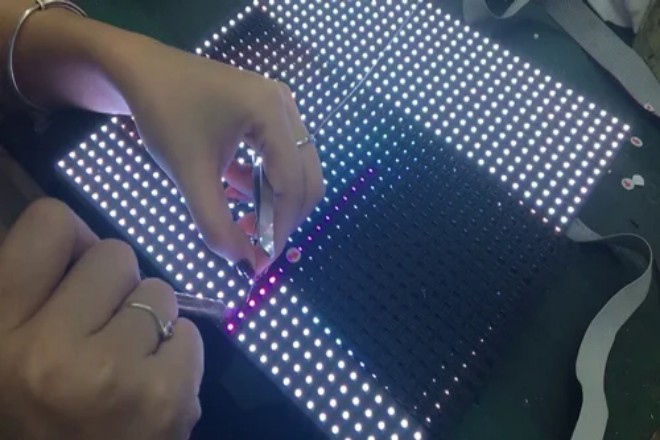
If the above two steps do not solve the problem, then there may be a hardware failure. We can use professional LED test instruments to detect the working status of LED lamp beads, driver ICs, and receiving cards one by one.

These test instruments are like a doctor’s stethoscope, which can help us find out which part has a problem. Once the faulty part is located, we can replace the damaged hardware component.

When replacing hardware, be sure to turn off the power to ensure safety. After all, the power tiger is not a joke.

4). Adjust the software settings to make the software and the display coexist harmoniously

Sometimes, improper software settings can also cause color blocks to appear on the screen. We can check the settings of the playback software, including parameters such as refresh rate, resolution, and color depth.

If the software version is too old, there may be compatibility issues. We can try to update the playback software to the latest version to see if the problem can be solved.

In addition, we can also adjust the software settings, such as increasing the refresh rate to reduce flicker or adjusting the resolution to match the screen size. These adjustments can make the software and the display coexist more harmoniously.

5). Maintenance precautions to keep the display as new as new for a long time

Finally, we also need to take maintenance precautions for the display. It is very important to clean and maintain the display regularly, especially for heat dissipation and waterproofing. If the display works for a long time or the working environment is harsh, it may cause hardware aging or damage.

We can also establish a regular inspection mechanism, including the review of signal lines, hardware status, and software settings. This can help in the timely discovery and dealing with potential problems and ensure the long-term and stable operation of the display.

Through the above 5 steps, I believe that the “caterpillar” fault on your LED display will be solved. If the problem still exists, you may need to contact a professional technician for further inspection.

3. How can the occurrence of "caterpillar" faults on LED displays be prevented?

To prevent the occurrence of “caterpillar” faults on LED displays, you need to start from multiple aspects. The following are some effective preventive measures:

1). Ensure that the data cable is firmly connected

  • Regular inspection: Regularly check the data cable between the display and the receiving card to ensure that the connection is firm and there is no looseness or damage.

  • Use high-quality data cables: Choose data cables with reliable quality and avoid using inferior or aging data cables to reduce loss and interference during signal transmission.

  • Reasonable wiring: When wiring, avoid the data cable being close to strong electricity or high-frequency equipment to reduce the impact of electromagnetic interference on signal transmission.

2). Correctly set the scanning mode

  • Understand the technical parameters of the display: When purchasing and installing the LED display, you should understand its technical parameters and scanning mode setting requirements in detail.

  • Correctly configure the scanning mode: According to the technical parameter manual of the display, correctly configure the scanning mode to ensure that the lamp beads can receive signals synchronously and avoid the occurrence of color block phenomena.

  • Regular calibration: Regularly calibrate the scanning mode of the display to ensure that it matches the hardware configuration of the display.

3). Strengthen hardware maintenance

  • Regularly check the hardware status: Use professional LED test instruments to regularly check the hardware, such as LED lamp beads, driver ICs, and receiving cards, to ensure that they are in normal working condition.

  • Replace damaged hardware in time: Once hardware damage is found, it should be replaced immediately to avoid the expansion of the fault.

  • Do a good job of heat dissipation: Strengthen the heat dissipation of the display to prevent hardware aging or damage due to excessive temperature.

결론

In summary, although the “caterpillar” failure of the LED display seems complicated, it can be effectively solved through careful inspection and targeted treatment. The key lies in the accurate judgment of the cause of the failure, the proficiency of the treatment steps, and the strict implementation of preventive measures.

Users should strengthen the daily maintenance and care of the LED display, clean, inspect, and test regularly, and promptly discover and deal with potential problems to ensure the long-term stable operation of the display and the best display effect.

마지막으로 LED 디스플레이에 대해 더 알고 싶으시다면, 우리에게 연락해주세요.

답글 남기기

이메일 주소는 공개되지 않습니다. 필수 필드는 *로 표시됩니다

지금 우리의 이야기를 시작합시다!

얻다 2023년 새 가격 지금 LED 화면용