

An LED display appears as a single, continuous image, but its truly “high-end” effect often comes from subtle details—such as brightness uniformity, colour consistency, and natural splicing.
If these details deviate, even the best content will be diminished.
Performing system calibration before LED display installation essentially means one thing: don’t wait until it’s installed to discover that “this screen doesn’t quite fit in.” Many on-site issues can actually be resolved before installation.
初め、 輝度 and colour consistency calibration are crucial. For example, a large screen in a ショッピングモール atrium is composed of dozens or even hundreds of modules.
If not properly calibrated beforehand, the left side of the image might appear warmer than the right.
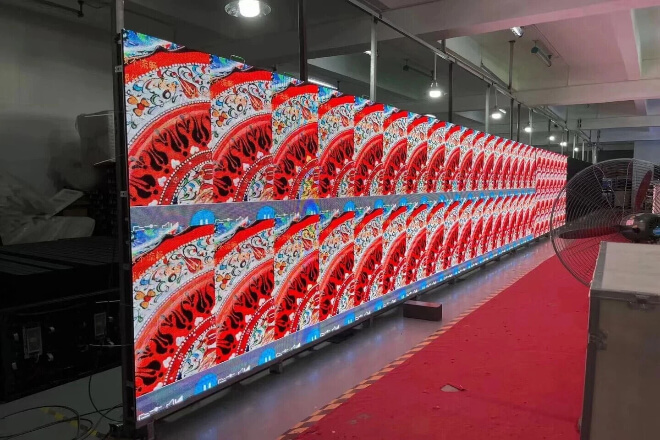
Before installation, engineers will run test images, such as pure white, gradients, and skin tones, to ensure the entire screen looks like a “continuous screen,” rather than a jigsaw puzzle.
Second, consistency testing between different batches of modules is essential. In reality, large screen modules are not necessarily produced in the same batch. For example, one batch might be slightly brighter than another.
Without pre-screening, “regional brightness differences” would appear in stadiums or shopping malls.
A common practice is to compare each module using grayscale test images, replacing or recalibrating any abnormal modules in advance.
Next is standardised parameter pre-setting. For example, brightness, colour temperature, リフレッシュレート, and other parameters are standardised at the factory or during the commissioning phase.
This way, during on-site installation, it’s like “directly loading the standard configuration,” eliminating the need for engineers to adjust on-site while observing the effect.
A very intuitive example: At a trade show, if the main screen hadn’t been pre-calibrated, a certain area of the product display might have been too bright, making the image look like a “photo with uneven lighting.”
However, after pre-calibration, the entire display emitted uniform light the moment it was turned on, making product details look cleaner and more sophisticated.
In a large LED display, what truly affects whether it “looks sophisticated” is not how bright each individual pixel is.
But whether the entire screen can achieve a seamless, undetectable splicing effect.
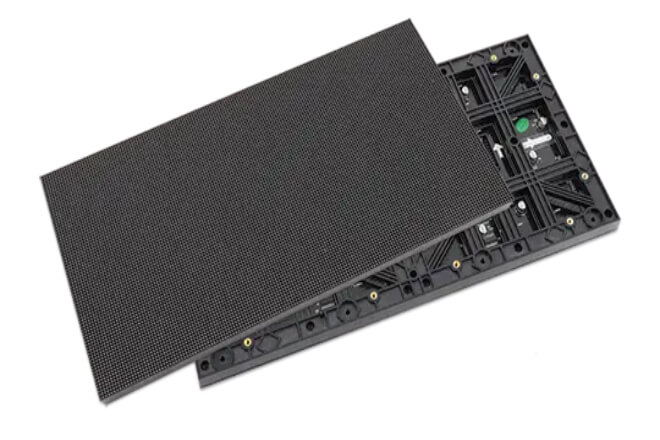
Module selection involves eliminating potentially inconsistent components before installation.
初め、 LEDモジュール from the same batch are selected. Modules produced in the same batch are more similar in terms of chips, luminous efficiency, and material consistency, naturally making them more likely to look alike.
For example, if a large ショッピングモール screen uses modules from different batches, some sections might be brighter than others, appearing as if the screen has distinct zones from a distance.
Second, 輝度 and colour temperature are graded. During factory testing, brightness and colour temperature are measured on a standard screen, categorising modules by value.
For example, one level brighter, one level standard, one level warmer, and then used in a unified combination.
This avoids the awkward appearance of “cool white and warm white mixed together.”
Furthermore, mixing different modules avoids colour differences. If modules are haphazardly assembled, such as mixing high-brightness and low-brightness modules, the difference might not be noticeable during the day.
However, at night or when displaying solid colours, a noticeable “segmentation” will appear. Viewers may not be able to pinpoint exactly what’s wrong, but they’ll feel the image is “unclean.”
A typical example: If a main screen at an 展示 hasn’t undergone module screening, when playing product advertisements, the upper left corner might appear slightly greyish, and the lower right corner slightly overexposed.
However, after standardised screening, the entire screen, when displaying pure white backgrounds or product close-ups, looks like a complete canvas, without any splicing artefacts.
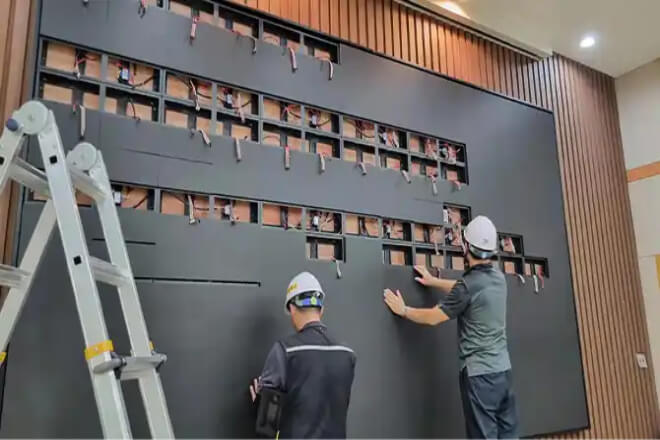
During the installation phase of an LED display, a crucial but detail-oriented task is controlling splicing accuracy.
If done well, the entire screen looks like a single piece of glass; if done poorly, subtle “splicing artefacts” will be visible, diminishing the quality of even the best image.
First, ensure the cabinet installation is flat. Each LED cabinet must be levelled during installation, repeatedly corrected with a level to avoid inconsistencies in height.
For example, if a section of a large ショッピングモール screen protrudes slightly, it may create a visual unevenness when displaying solid colour images.
Second, control gaps and structural errors. The seams between the LED display units must be strictly controlled to an extremely small extent.
Even a deviation of a few millimetres can become a noticeable “line” when magnified on a large screen.
In engineering practice, precision snap-fit structures and calibration tools are typically used to minimise errors, making the gaps “imperceptible to the naked eye.”
Next is maintaining horizontal and vertical alignment. Not only must individual units be accurate, but the entire wall must be consistently aligned horizontally and vertically.
If a row is even slightly misaligned, the problem will be easily exposed when displaying grid backgrounds or linear graphics, appearing as a “slight misalignment.”
For a very intuitive example: if the splicing of a スタジアム screen is not precise enough, the lines of the stadium may appear slightly broken when playing slow-motion replays.
However, if the splicing precision is well controlled, even when playing high-contrast images, such as white text on a black background.
Or slow-motion close-ups, almost no seams are visible, and the entire display appears as a single, luminous screen.
The system debugging step can be understood as the “finishing touches” before the LED display goes live—it’s not enough for it to just light up.
It needs to be consistently bright, comfortably bright, and so bright that the “splitting” is undetectable.
初め、 輝度 and colour are calibrated area by area. The large screen isn’t produced as a single piece, but rather pieced together in sections, so each section needs to be individually “matched” during debugging.
For example, if the left side is slightly warmer and the right side slightly cooler, it needs to be gradually brought back to a unified standard.
Otherwise, when playing the same advertisement, it will look like the screen is applying its own split-screen filter.
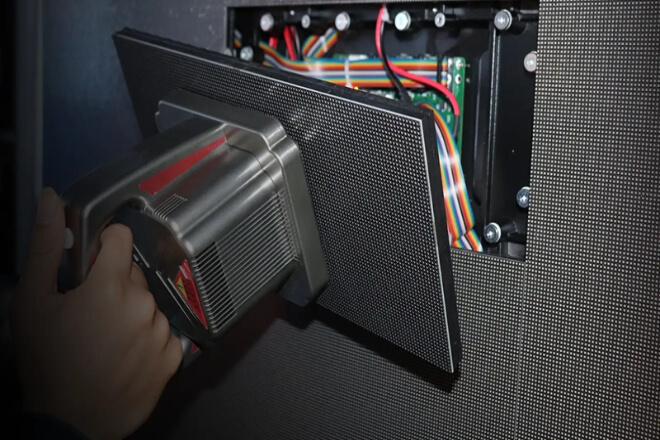
Second, professional calibration equipment is used to unify the image performance. This step is somewhat like giving the screen a “physical examination and colour adjustment.”
Engineers use the equipment to play standard white, grey, and colour test images, then adjust the values little by little to make the performance of each module more consistent.
It’s not about saying “good enough” based on intuition, but about achieving uniformity down to the parameter level.
Finally, grayscale and contrast parameters are optimised. If grayscale isn’t properly adjusted, the image might appear as “blacks not deep enough.
Whites not bright enough”; inappropriate contrast will make the entire screen look greyish or overexposed.
After proper adjustment, the image will have significantly more depth; for example, product details will be clearer, people will have more texture, and it will look more “high-end.”
For a very intuitive example: some poorly adjusted large screens in shopping malls might show faces in advertisements with one side appearing yellowish and the other white, looking like “different lights pieced together.”
However, after system adjustments, the same image will look very natural, as if the entire wall is emitting light from the same source.
The real test for LED displays isn’t “the moment they’re first installed,” but rather after a period of use—whether they can still look consistently new, uniform, and pleasing to the eye.
First, regular 輝度 and colour maintenance are crucial.
Over time, the luminous efficiency of different areas of the screen will gradually differ; for example, some areas may be slightly darker or have slightly off-colours.
Regular maintenance is like “touch-up makeup,” bringing the overall brightness and colour back to a consistent standard, avoiding localised fatigue.
Secondly, maintaining balance involves replacing ageing modules. LED modules have a lifespan, and their brightness decreases over time.
Replacing only faulty modules without a comprehensive assessment can result in a mix of old and new components.
For example, the newly replaced module on the left might be exceptionally bright, while the old one on the right remains dim, making the screen appear as if it’s from two different generations.
Therefore, a more professional approach is to assess by area and replace modules in batches to maintain overall balance.
Next, establishing an operational monitoring and calibration mechanism is crucial. Many large screens now connect to backend systems that monitor brightness, colour, and operational status in real time.
Once a deviation is detected, parameter adjustments can be made remotely, rather than waiting until it’s visually apparent. This approach is more like a “continuous checkup,” preventing problems early.
For a real-world example, a shopping mall’s main screen, if neglected for years, might develop a darker centre and brighter edges, giving it an “old-looking” appearance when displaying advertisements.
However, with regular calibration and monitoring, even after many years of use, the overall image can remain uniform and clean, appearing consistently “online.”
