
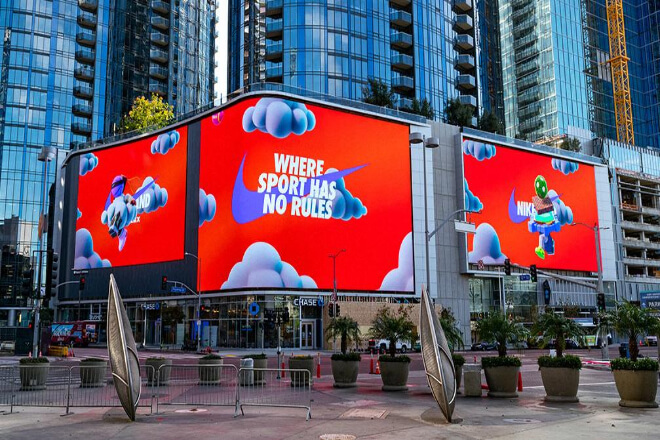
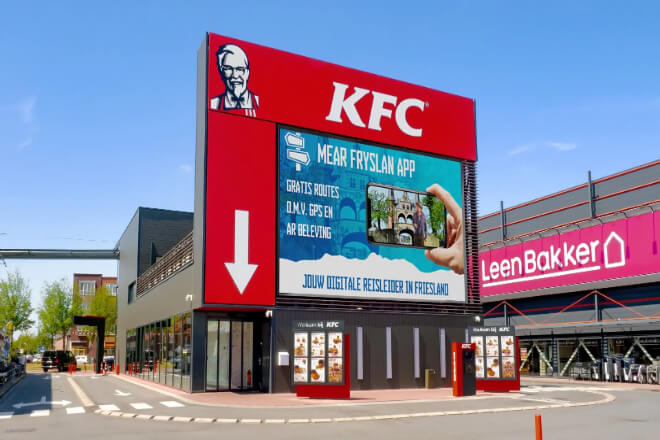
Hanging an affichage LED extérieur on a building facade may seem like a simple visual issue, but in reality, it’s more of a systems engineering project.
From structural safety to signal transmission, from the site environment to post-installation maintenance, every aspect needs to be planned in advance.
Otherwise, just getting the screen to light up is the first step; stable long-term operation is crucial.
Before installing the LED screen, this step is absolutely essential—a thorough inspection of the “site where the screen will be installed”!
Measure the dimensions, check the flatness, and test the load-bearing capacity.
Any mistake in any of these steps could ruin the subsequent installation. Don’t take this step lightly; it’s the lifeline for a successful installation.
At the same time, environmental factors must be considered:
How strong is the wind?
Will rain or snow hit the screen?
Is the sun shining on it every day?
These directly affect the long-term safe and stable operation of the screen.
And don’t forget, does the building permit external mounting or embedding of LED screens? Have all the necessary approvals been obtained?
Don’t rush into installing the LED display screen; that’s illegal and could lead to serious trouble.
In short, this step is crucial and requires meticulous attention to detail. Confirming the dimensions, structure, environment, and compliance is essential for smooth and safe construction.
At the design stage, it’s no longer just about “wanting to install a screen,” but about implementing a concrete plan. Essentially, this step transforms your “idea” into “constructible blueprints.”
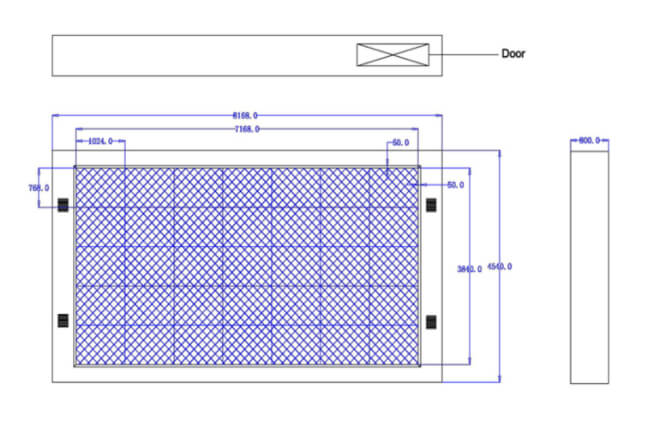
First, determine the core parameters of the LED screen, including size, résolution, et pas de pixel. These directly determine the final image clarity and viewing experience.
Especially important is the varying viewing distance, which significantly impacts parameter requirements; these cannot be arbitrarily determined.
Next is the structural design. A modular splicing approach is typically used, breaking the large screen down into standard units.
This facilitates transportation and makes future maintenance more flexible—only replace the damaged section without disassembling the entire screen.
Simultaneously, the installation method must be planned based on site conditions, such as external mounting, suspended mounting, or embedded installation.
Different structures require different fixing schemes. The support structure and stress distribution must be designed in advance to ensure both stability and safety after screen installation.
Simply put, this step involves clearly designing the screen’s length, assembly, and mounting details, providing a directly executable technical solution for subsequent construction.
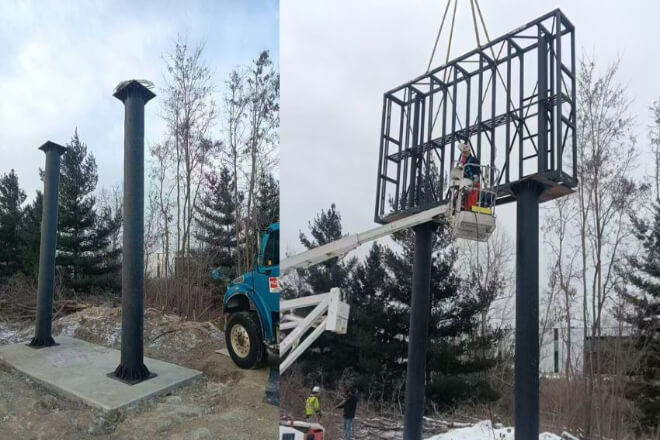
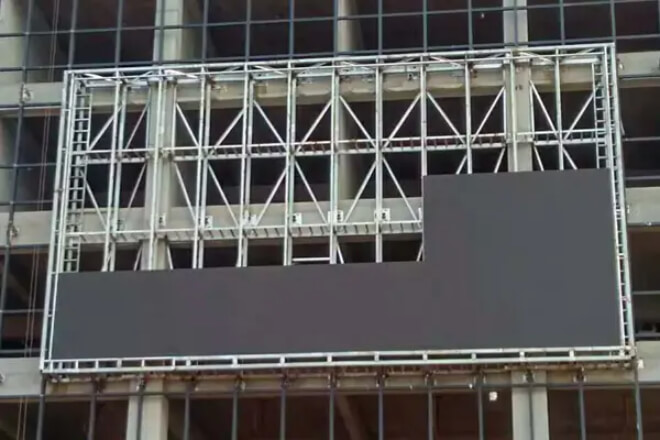
This step is equivalent to “building the skeleton” for the LED screen. The stability of the skeleton largely determines the long-term safe operation of the screen.
First, the steel frame or aluminum alloy support is fabricated according to the design drawings.
Each profile must be cut strictly to size to ensure precise alignment during assembly without deviation.
Next, on-site installation is carried out, fixing the support to the building facade. Common methods include bolt fixing, welding connections, or specialized hanging systems.
Different structures require different stress distribution methods, but the core objective is the same: stability.
For example, when installing a large LED screen on the exterior facade of a centre commercial, steel structure connection points are usually pre-embedded in the concrete wall.
And then the main frame is fixed to it with high-strength bolts to ensure that it will not shift even under long-term wind loads.
In some large-scale stadium projects, an integral steel frame structure, similar to an “external skeleton,” is used.
This is first welded in sections on the ground, then hoisted as a whole to a high position for fixation. This reduces the time spent working at heights and improves safety.
Simultaneously, this step requires thorough protective measures, including anti-corrosion coatings, earthquake-resistant structural reinforcement, and wind-resistant design.
For example, in outdoor settings, the steel structure is usually hot-dip galvanized to prevent rust and corrosion under long-term wind and rain.
In high-wind areas, additional diagonal bracing structures are added to improve overall stability.
Simply put, this step is about “building a skeleton that can withstand wind and rain” on-site, providing a sufficiently safe, stable, and reliable foundation for the subsequent LED screen installation.
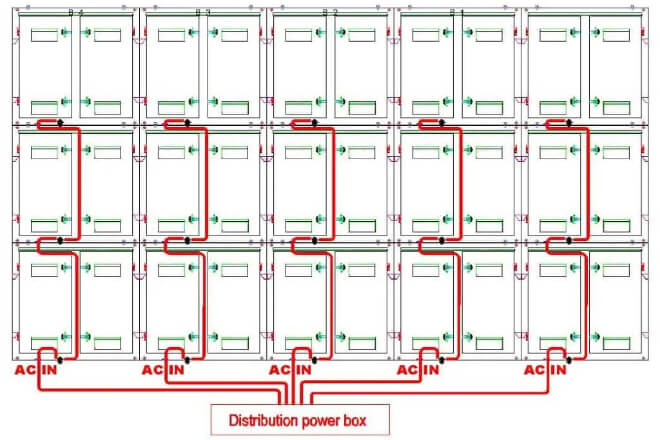
After the screen skeleton is built, the next crucial step is “energizing the screen and enabling data flow”—the installation of power and signal lines.
First, the power lines must be laid out, ensuring that each line has reliable grounding and lightning protection measures.
Especially for outdoor or high-rise installations, lightning protection and grounding are not only safety requirements but also prerequisites for ensuring the long-term stable operation of the screen.
Next, signal and control cables are laid to ensure the screen can stably receive video and control data.
Cable routing should be rationally zoned to avoid interference, while also reserving interfaces for future debugging and maintenance.
To protect the wiring from environmental influences, waterproof conduits or cable trays should be used to encase the power and signal cables.
This ensures that even in the event of rain, dust, or occasional impacts, the wiring remains safe and reliable, without affecting screen operation.
For example, in the installation of a large screen in an outdoor basketball court, power cables are typically hidden in conduits inside the support frame.
While signal cables are laid along the support beams and covered with waterproof cable trays.
This ensures aesthetics, prevents rainwater from entering the cable interfaces, and facilitates future maintenance.
Simply put, this step is about “supplying energy” to the LED screen, ensuring it not only stands firmly but also functions stably, allowing the image to truly come alive.
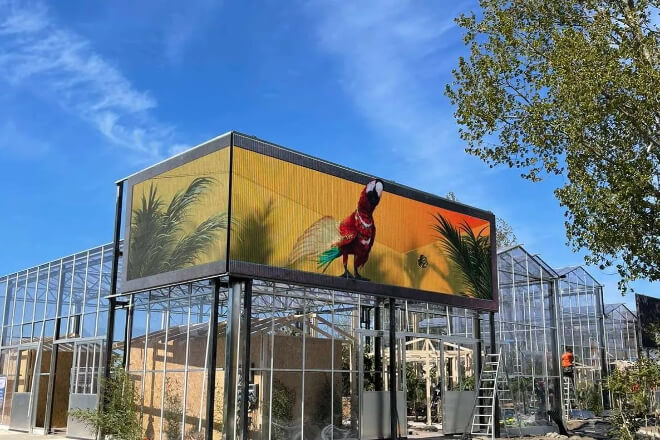
At this stage, the screen begins to “truly take shape”—like assembling building blocks, the individual Modules LED are gradually assembled into a complete image.
First, the modules are installed piece by piece according to the pre-designed modular plan. Each module requires precise alignment; a “close enough” approach is not sufficient.
Accurate positioning and consistent orientation are crucial to prevent misalignment or uneven gaps in the overall image.
During the splicing process, “flatness” is paramount. Modules must fit together perfectly, seamlessly.
Even slight height differences will be magnified when the large screen is lit, so on-site adjustments are usually very meticulous and require repeated calibration.
For example, in stadium large-screen installations, workers install modules one by one, observing the splicing effect from different angles.
Sometimes, temporary disassembly and readjustment are necessary to ensure the overall image appears as a single, continuous screen, not a patchwork of individual components.
After installation, the display effect is checked module by module, including luminosité consistency, color uniformity, and the presence of dead or dark pixels.
For instance, playing pure red, pure green, and pure blue test images allows for easy identification of any abnormal pixels.
In simple terms, this step is about assembling the scattered “modules” into a complete, uniform, and seamless large screen, allowing the image to truly begin to possess an overall visual effect.
All modules are installed, but the large screen cannot be used directly.
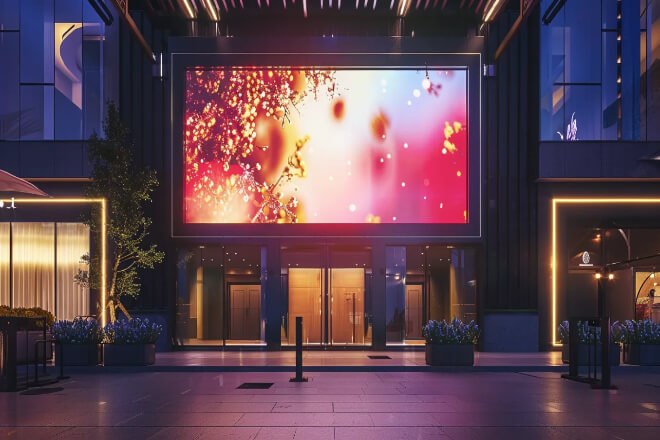
This step is about “bringing the screen back to life,” transforming it from a collection of cold, impersonal modules into a vibrant and dazzling visual behemoth.
D'abord, luminosité, contrast, and color uniformity must be adjusted to ensure the entire screen, from left to right and top to bottom, is in a state of “eye comfort and color consistency.”
No area can be darker or have a color cast than other areas; otherwise, viewers will be immediately distracted.
Then comes the “mine-sweeping” stage, checking for bright spots, dark spots, and dead pixels.
Test images in pure red, pure green, pure blue, and even grayscale are played, and technicians scrutinize each pixel like detectives, immediately adjusting any abnormalities.
Imagine each bright spot as a potential “little troublemaker that ruins the scene,” which must be eliminated completely.
Finally, a comprehensive check of the control system is performed: the playback device, sending card, receiving card.
And control software all need to be powered on and run to ensure smooth switching and a stable signal.
No matter how beautiful the screen is, if the control system malfunctions, all the work is for nothing.
An interesting scenario: when technicians are debugging, it’s like playing “hide-and-seek” with the screen.
They have to find and correct every dark and bright spot, turning the entire screen into a “flawless giant canvas.”
Simply put, this step is the “makeup and physical examination” of the screen.
Adjusting the brightness, color, pixels, and system settings makes the LED screen truly dazzling, leaving viewers amazed: “Wow, this is what a large screen should look like!”
After the screen lighting test is completed, we can’t relax and call it a day. The final step is a comprehensive “safety reinforcement” of the entire system.
First, a waterproof cover or rain shelter must be installed, like putting a protective coat on the large screen to prevent rain and snow from directly corroding the screen structure.
Especially in outdoor environments, this step determines whether the screen can withstand the weather stably in the long term.
Next, the cooling system needs to be checked. LED screens generate heat during prolonged operation, and poor heat dissipation can easily affect display stability in hot weather.
Therefore, it’s necessary to confirm that the fans, cooling channels, or air conditioning system are functioning properly, ensuring the screen operates coolly even when hot.
Finally, a comprehensive safety inspection is conducted. Each component of the screen structure must be checked for sturdiness, tightness of bolts, stability of the brackets.
And any looseness or potential safety hazards. Even a small loose screw can amplify risks over long-term operation.
To illustrate, technicians will conduct a thorough inspection of the entire screen structure from top to bottom, like a final check.
Sometimes even tapping the brackets to confirm their stability, ensuring it can withstand wind and rain.
In short, this step is like “final insurance” for the entire LED display system, confirming waterproofing, heat dissipation.
And structural safety to ensure the screen can operate stably and reliably for a long time, without any potential problems.
Once the screen is successfully installed, debugged, and protected, the project enters its final step—acceptance and long-term maintenance planning.
This step is equivalent to “officially accepting” the entire system and establishing a long-term operational mechanism.
First, a comprehensive acceptance test must be conducted on the entire system, including the screen’s display effect, the stability of the support structure, the safety of the power supply, and the operation of the control system.
Each aspect must be verified item by item to ensure no issues are overlooked, allowing the entire system to meet the standards for long-term stable operation.
Next, a maintenance mechanism needs to be established. Complete maintenance records are required, including daily operating status, inspection cycles, and the usage of key components.
Simultaneously, regular cleaning and inspections should be planned, such as cleaning the screen surface, checking wiring.
And maintaining the cooling system to ensure the equipment remains in good condition for a long time.
Furthermore, contingency plans should be developed in advance. In the event of a local module malfunction, signal problem, or power supply failure.
The issue can be quickly located and addressed to avoid affecting the overall display effect and ensure uninterrupted advertising or information display.
To illustrate, imagine creating an operational profile for a large piece of equipment. Regular maintenance is performed according to plan, and problems are addressed quickly.
Ensuring the entire system remains stable and controllable, rather than waiting for issues to arise before taking action.
Simply put, this step shifts from “installation complete” to “long-term operation and management,”
Ensuring the LED advertising screen not only lights up but also operates stably and efficiently over the long term.
