
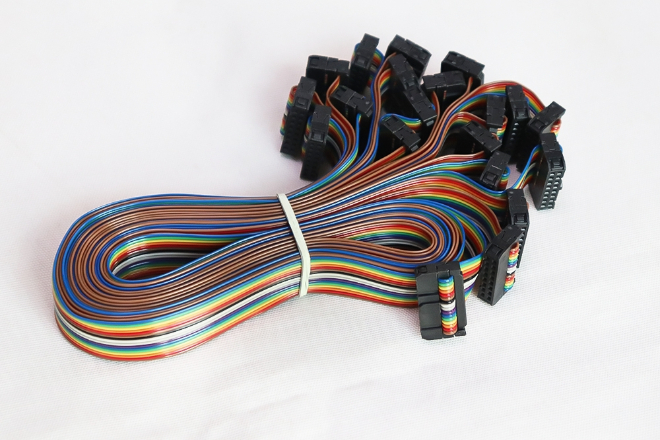
1). Overall appearance of cable
First, take a close look at whether the cable has obvious scratches, wear, or deformation. For example, scratches may scratch the insulation layer, exposing the wire inside, which is easy to short circuit or leak.
Wear will make the cable fragile and may break if you are not careful; if it is deformed, it may not be installed properly on the LED display or affect signal transmission.
Then, touch the surface of the cable to see if it is smooth and whether there is any dirt or foreign matter stuck on it.
If the surface is rough or has foreign matter, it may scratch your hands during installation or cause problems due to friction or a humid environment after long-term use.
You can touch it gently with your hand to see if there are any burrs, and then use a magnifying glass to carefully check if there are any small dirt.
For example, some LED display cables may be scratched during transportation, and scratches may appear on the surface.
If the scratches are deep, the insulation layer may be damaged, resulting in unstable signal transmission or even a short circuit, causing abnormal screen display.
2). Cable size and specifications
Measure the length, width, and thickness of the cable to see if it meets the requirements of the LED display.
Use a more accurate tool, such as a caliper, to measure and ensure that the size is correct.
If the cable is too short, it may not be connected to the device; if it is too long, the signal may become weak when it is transmitted.
Width and thickness are also important. If they do not meet the requirements, the cable may not be strong enough or have insufficient conductivity.
In addition, check whether the interface of the cable meets the standards and can perfectly match the device.
The type, size and pins of the interface are critical. If the pins are bent, broken or rusted, the signal transmission will be affected.
For example, if the interface pins of the cable are oxidized, the contact resistance may increase, affecting the stability of signal transmission, causing the LED display to flicker or partially not display.
1). Detection of conductive materials
First, it is necessary to find out what material the conductive part of the cable is made of, such as whether it is copper wire, the quality of the copper wire, and whether it is pure.
If the copper wire is of good quality, the conductivity is good, the resistance is small, and the signal transmission efficiency is high.
It is also necessary to see whether the conductive material is resistant to oxidation and corrosion.
If the oxidation resistance is not good, the surface will easily oxidize over time, and the contact resistance will increase, affecting signal transmissio.
If the corrosion resistance is poor, the cable will easily break in a humid environment or in the presence of chemicals.
For example, for LED displays used outdoors, the cable may be exposed to a humid environment.
If the corrosion resistance of the conductive material is poor, the cable may be damaged in a short time, causing the screen to not work properly.
2). Evaluation of insulation materials
Next, check the insulation layer. Check whether the insulation layer is thick and uniform.
If the insulation layer is too thin or uneven, it is easy to leak electricity or be damaged by external forces.
It is also necessary to analyze the high and low temperature resistance of the insulation material. After all, the cable may be used in various environments.
If the temperature changes greatly, if the insulation layer cannot withstand it, it is easy to have problems.
Finally, don’t forget to measure the insulation resistance. The higher the insulation resistance, the better the insulation performance and the safer and more reliable the cable.
For example, if the insulation layer is uneven, it may cause local leakage, affect the display effect of the LED display, and even damage the screen.
1). Resistance test
Take a multimeter, connect the two ends of the cable, and measure the resistance.
If the resistance value is particularly large, or the multimeter shows “infinity,” it is estimated that there is a break in the cable, and the signal cannot be transmitted.
If the resistance value is particularly low or even close to zero, it may be a short circuit; the current takes a shortcut directly, and the signal cannot be transmitted well.
Under normal circumstances, the resistance value should be within a reasonable range, depending on the length and material of the cable.
For example, a shorter and better-quality cable will have a lower resistance value.
Also, check whether the resistance value meets the requirements of the LED display because the current transmission efficiency required by the device is different.
If the resistance value is not appropriate, the device may not work properly, such as poor display effect or easy heating.
For example, if the resistance value is too high, it may cause uneven brightness of the LED display or partial non-display.
2). Signal integrity test
Next, see how the cable performs when transmitting signals. Connect the cable with an oscilloscope, send a test signal, and then observe the signal waveform displayed on the oscilloscope.
If the waveform is complete, without obvious deformation, distortion, or interference, it means that the signal is transmitted well.
If the waveform becomes weaker (this is signal attenuation), or there are clutters on the waveform that should not be there (this is interference), then there may be problems with the quality of the cable.
Signal attenuation may be caused by the cable being too long or having poor conductivity, and interference may be caused by poor shielding performance of the cable or electromagnetic interference in the surrounding environment.
In short, only when the signal integrity is good can the device work properly, and the displayed image will not flicker or have color deviation or screen distortion.
For example, if the signal integrity is not good, the LED display may have screen distortion or flicker, affecting the viewing experience.
1). Flexibility test
Flexibility is particularly important for the cable, especially in actual use; the cable may be bent or folded and even forced into some small spaces during installation.
You can pick up the cable and gently bend it repeatedly several times to see if it will break or deform easily.
If the cable breaks as soon as it is bent or deforms after a few bends, then its flexibility is definitely not good.
A cable with good flexibility can return to its original state no matter how it is bent, and it will not break easily. This type of cable will be more convenient and durable during installation and use.
For example, in some scenarios where the device needs to be moved frequently, a cable with poor flexibility is easily damaged by repeated bending, while a cable with good flexibility can easily cope with it.
2). Tensile strength test
In addition to flexibility, tensile strength is also an important indicator for measuring the durability of the cable.
In actual use, the cable may be stretched by external forces for various reasons, such as being accidentally stepped on, being hooked by other things, or being pulled during installation.
You can find a suitable place, fix the two ends of the cable separately, and then slowly stretch it to see how much tension it can withstand.
If the cable breaks after a slight pull, then its tensile strength is definitely not enough. Cables with high tensile strength will be safer during use and are not easily damaged by accidental pulling.
For example, in some industrial environments, equipment may be moved frequently. If the tensile strength of the cable is not enough, it is easy to be broken, causing the equipment to not work properly.

1). Welding process inspection
Welding is particularly important for the cable of the LED display because it directly affects whether the screen can display normally.
A good solder joint should be round and full, like a small drop of water, indicating that there is just enough tin during soldering and the connection is very firm.
If the solder joints look bumpy or flattened, it may be a cold solder joint. Cold solder joints can cause unstable signal transmission, and the screen may flicker or display abnormally.
Then, check if there are any places where the solder joints should be soldered. If some places are not soldered, the circuit will definitely not work, and the screen may appear black or partially display abnormally.
If the welding process is good and the solder joints are regular, the quality of the LED display cable is generally correct.
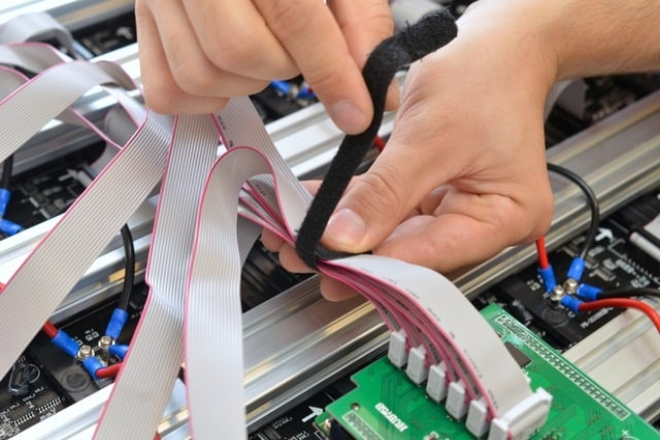
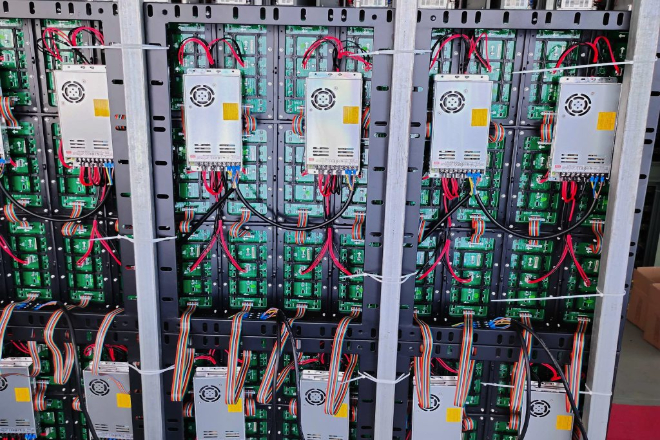
2). Wiring process evaluation
Take a look at the wiring of the LED display cable. This is not just for the sake of appearance.
If the wiring is messy and the wires are cross-entangled, the signal transmission is easy to “fight,” resulting in delays or losses.
For LED displays, unstable signal transmission can cause flickering, color deviation, or display abnormalities.
Moreover, wiring that is too messy will affect heat dissipation. The wires are piled together, and the heat cannot be dissipated.
After a long time, the cable is easy to overheat or even burn out, causing screen failure.
Therefore, good wiring should be neat and tidy, without crossing or entanglement between wires.
So that the signal can be transmitted smoothly, the heat dissipation is better, and the LED display screen is safer to use.
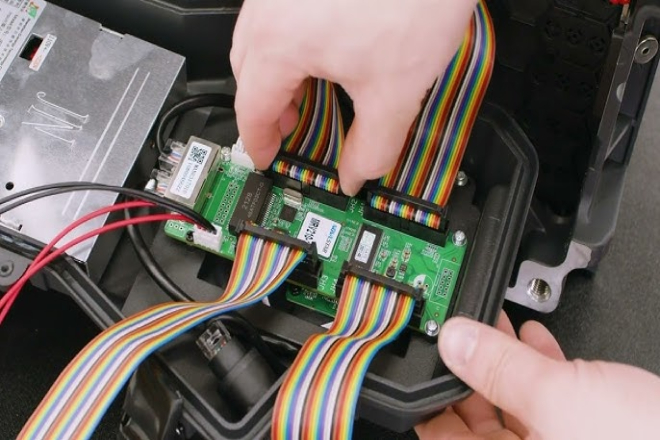
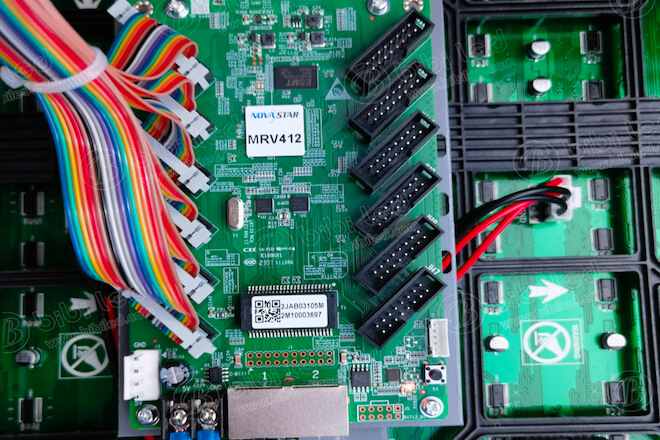
1). Compatibility of the flat cable with different devices
The flat cable is like a connecting wire. You have to see if it can be properly matched with various models of LED displays.
It’s like you bought a charging cable, and you have to try to see whether it can charge mobile phones of different brands.
1.1). Test whether it can be used:
Connect the flat cable to different LED displays to see if the screen can display the content normally.
For example, try connecting it to a small screen first, and then to a large screen. If the screen can display normally, it means that the flat cable and the screen can work well together.
1.2). Check if there are any problems:
If the screen flickers, the color is wrong, or it simply cannot display anything, it may be that the flat cable and the screen do not match; that is, there is a compatibility problem.
At this time, you have to check carefully to see if there is a problem with the flat cable or if the screen itself is faulty.
2). Synergy between the cable and other components
The cable should not only work well with the display but also work smoothly with other electronic components (such as the power supply and controller). It’s like a team, and each part must work well together.
2.1). See if they can work together:
Check whether the connection between the cable and the power supply and controller is stable.
For example, can the power supply normally supply power to the display through the cable, and can the controller accurately transmit the signal to the display through the cable?
If all these can be done, it means that they work well together.
2.2). Check for interference or conflict:
Sometimes, the cable may “fight” with other components. For example, if the cable is too close to the power line, the signal may be unstable due to electromagnetic interference, and the screen will flicker, or the color will be wrong.
At this time, you have to check whether the cable is too close to other lines, or whether a shielding measure is needed.