Introducción

While using an Pantalla LED, have you ever encountered a situation where the screen suddenly went dark or flickered?
When faced with this problem, many people’s first reaction is that the fuente de alimentación is broken, but is that really the case?
Can you replace the power supply yourself? This article will reveal the answers to these questions.
Tabla de contenido
1. First, determine: Is the power supply truly broken?
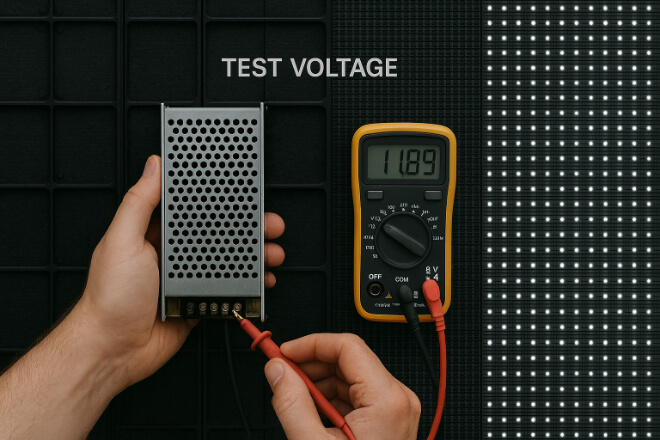
Don’t rush to buy a replacement fuente de alimentación—often, the “screen off = power supply bad” assumption is just a hunch.
When you encounter a problem, first perform a few simple and practical troubleshooting steps:
The entire screen may be completely dark, the screen may flicker intermittently, or only a certain area may be dark. Each of these phenomena has its own suspects.
A completely dark screen often leads to the power supply, but it could also mean the control card is not powered or the signal is interrupted.
Intermittent flickering often indicates poor contact or unstable power output; and a partial dark screen generally leads to the module or branch power supply line.
The troubleshooting process is actually very simple, just like a technician performing an on-site inspection: first, swap the “off” module with a functioning module next to it. If it works as intended, it’s the module’s fault; if it doesn’t, it’s not.
Check the indicator lights and network port lights on the control card. If they’re not lit or display abnormally, don’t rush to replace the power supply.
Gently press and unplug the power and signal cables. Many so-called “broken” faults are simply loose connections.
Also, smell for a burning smell and inspect components for bulges or discolouration. These visual clues are crucial.
As for tools, a multimeter can help you make a preliminary assessment: Set the meter to the DC voltage setting and test the power supply output (commonly 5V/12V, etc.) for stable voltage.
Remember to confirm the wiring connections before operating, use insulated tools, and avoid touching exposed conductors when measuring with power on.
If you’re not familiar with working with live wires, don’t be too timid. Take a few photos of the problem or share the measured voltage with the electrician/supplier for further evaluation by an experienced person.
As a final word of advice: confirm the power supply is truly faulty before replacing it; it saves both money and trouble.
2. Can you replace it yourself? This depends on the following factors.
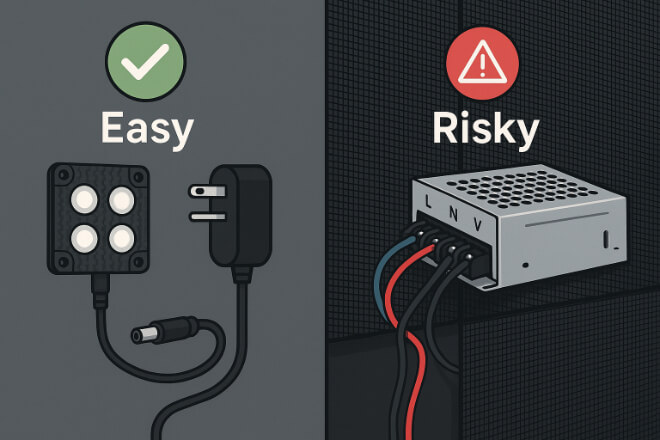
First, determine the type of power supply you’re replacing. If it’s a faulty power supply for a single module, these are small, low-power, and relatively easy to replace: simply unplug a wire, remove a screw, and replace it with the same model.
But if it’s the main power supply for an entire display, it’s like the “heart” of the entire power supply system, involving numerous wires and high currents. A single misstep could cause more than just a screen not lighting up.
Second, consider your electrical engineering skills. Can you use a multimeter? Do you know how to distinguish between live, neutral, and ground wires? Can you understand the input and output specifications on the power supply label?
These aren’t meant to scare you; if you truly don’t know, don’t force yourself. A power supply isn’t a lightbulb; plugging in the wrong wire could burn out the motherboard.
Confirm that the power supply is of good quality and is a universal model. Some displays use standard 5V/12V power supplies, which are readily available at any electronics store.
However, there are also custom models that differ in wattage, voltage, and interface.
Simply buying a replacement and installing it won’t only fail to solve the problem, but it could potentially render the entire screen useless.
Finally, don’t forget an often-overlooked point: the warranty. Is the screen still under warranty?
Many manufacturers will void the warranty if you tamper with it without authorisation. If a more serious problem arises, even free repairs won’t be possible.
In short, if it’s a small power supply, you’re knowledgeable, the model is readily available, and the warranty has expired, then replacing it yourself shouldn’t be a problem.
Otherwise, it’s better to hire a professional; the expense of the labour is far better than burning the entire screen.
3. Potential Risks During the Replacement Process?
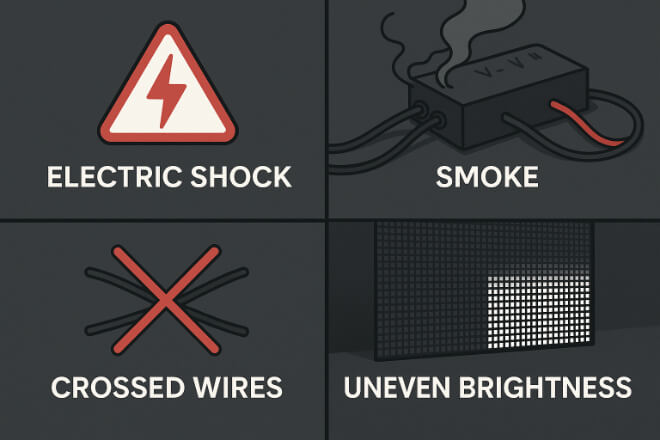
Replacing a power supply may seem like simply unplugging the old one and replacing it with a new one, but there are actually many hidden pitfalls, so don’t be too careless.
First, let’s talk about the risk of electric shock, which is the most direct danger.
Even a small screen in the office can draw a shocking amount of current when powered on.
Many people assume low power is safe if their hands slip and touch bare wires while unplugging cables; they could get shocked, numb their hands, or even worse.
Additionally, there’s the risk of a power short circuit. If a new power supply is plugged in incorrectly or the connector isn’t securely plugged in.
Smoke could instantly appear, damaging not only the power supply itself but also the control card and modules.
A friend accidentally replaced the power supply for a small screen and connected two wires incorrectly.
The power supply started smoking, and several areas of the screen went black—a significant loss.
Wiring errors are also a common pitfall. Even simply connecting the live and neutral wires incorrectly can cause the entire module to malfunction.
Resulting in uneven brightness or even burning out certain modules, completely altering the overall display quality.
Another easily overlooked issue is operating without disconnecting the power cord. To save time, some people remove and plug in the power supply without disconnecting the main power cord.
This operation is extremely risky. A flash of electric arc can not only burn components but also burn or scratch hands.
Finally, don’t forget the potential impact on the screen’s lifespan and brillo consistency.
Even if the power supply is replaced, if the new power supply’s output voltage is slightly higher or lower, over time, the LED brightness will gradually decrease, resulting in uneven colour and uneven display, making the entire screen look different.
For example, some people, to save money, use a universal power supply instead of a custom one.
As a result, the screen experiences uneven brightness and colour deviations shortly after powering on, requiring further rework.
So, replacing a power supply isn’t just a matter of plugging it in and calling it a day. Every step requires care; otherwise, a small mistake could damage the entire screen.
4. If you've decided to replace it yourself, how can you do it safely?
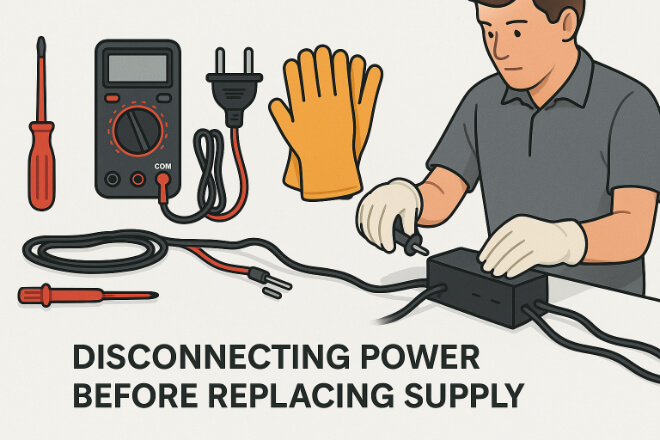
If you’ve confirmed you want to replace the power supply yourself, safety comes first. Be prepared with the necessary tools and procedures to avoid potential problems mid-repair.
First, prepare your tools. Don’t rely on your hands alone. At a minimum, you’ll need an insulated screwdriver and a multimeter, and perhaps a soldering iron if necessary.
The insulated screwdriver prevents accidental contact with live components, the multimeter verifies the voltage, and the soldering iron is a handy tool for repairing solder joints or removing connectors.
Next, disconnect the power supply. This is the most important step, but also the most easily overlooked.
Turn off the main power supply and confirm that the screen is not powered before proceeding. Don’t risk electric shock just to save a few minutes.
Next, remove the wiring and the old power supply. Remember to mark the location of each wire and, if possible, take a photo as a backup.
This will save you a lot of trouble later when rewiring. Be gentle when removing the power supply and avoid pulling on the wires to avoid damaging the connectors or modules.
Next, install the new power supply. The new power supply must match the old one’s specifications, including voltage, current, and connector type.
Even if they’re the same model, double-check the marked parameters to avoid the embarrassing situation of “installing it, only to find the wrong voltage, causing the screen to light up for a short while and then fail.”
Finally, test the power supply. After completing all connections, don’t rush to close the cover.
Turn on the power supply first to check for normal output and stable screen illumination. Once everything is working properly, secure the power supply and organise the cables.
In general, taking your time and checking carefully is much safer than just plugging things in hastily.
With proper safety awareness, the entire replacement process will be smooth and less prone to accidents.
5. What should I pay attention to when choosing a power supply for an LED display?
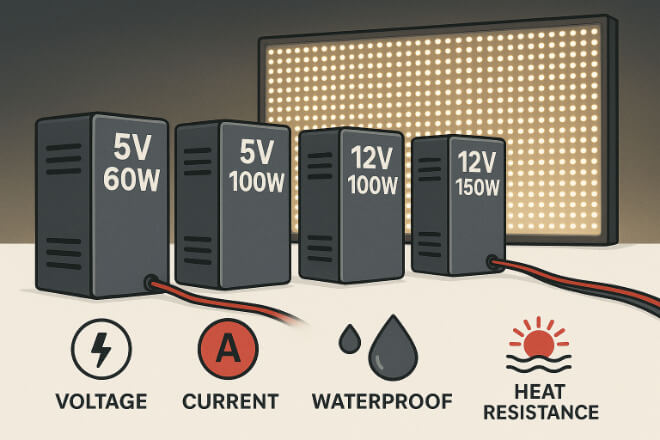
When choosing a power supply for an LED display, don’t just look at the price. Pay attention to several key factors; otherwise, even the best screen can be compromised.
First, check the voltage and current.
Before purchasing a power supply, confirm the original power supply’s output specifications.
High voltage can easily burn out the modules, while low voltage can lead to insufficient screen brightness or flickering.
Insufficient current can also cause the screen to occasionally “stop working.” In short, mismatched specifications can be the beginning of trouble.
Next, check if the power supply is specifically designed for LED displays. A regular power supply can illuminate the screen, but LED displays require a constant voltage power supply to ensure stable power supply to each module.
If you use a general-purpose power supply, the screen will experience uneven brightness, colour deviation, and rapid ageing over time. The more you save money, the more you regret it.
Brand and quality are also crucial. Cheap products may look attractive, but they have a short lifespan, poor stability, and even the risk of explosion.
Especially for large screens or those used 24/7, choose a reliable brand. While it may be more expensive, it provides greater peace of mind.
Finally, consider waterproofing, dustproofing, and high-temperature resistance.
Don’t use an indoor power supply for outdoor screens. Sunlight, rain, and dust can cause the power supply to short-circuit or trip, leading to a complete screen shutdown.
In short, the power supply is the heart of the LED screen. Choosing the right one will ensure a stable and reliable display for years.
While choosing the wrong one can cause even the most expensive screen to experience problems sooner rather than later.
6. When is it recommended to hire a professional?
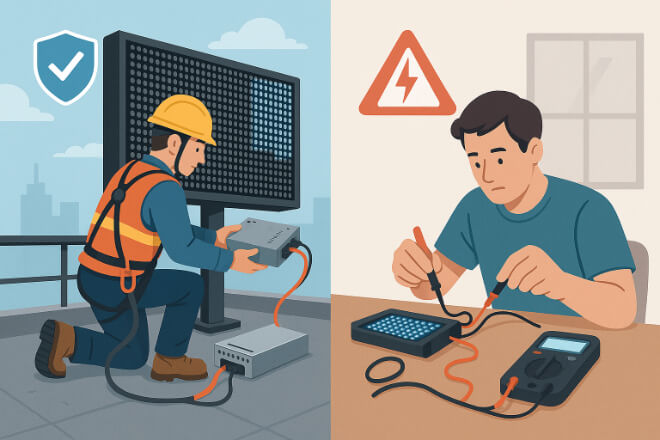
In some cases, replacing an LED screen’s power supply yourself is unreliable, and hiring a professional is a safer option.
For example, large screens or those with complex mounting structures. The larger the screen, the more power lines and the higher the power draw, making disassembly and installation more challenging.
A single mistake could damage the module or control card, or even tilt the entire screen, significantly compromising the display quality.
Another example is LED screens located at height or in difficult-to-dismantle locations.
For example, on outdoor rooftops, billboards, and suspended curtain walls, not only are the power supply lines complex, but safety precautions are also crucial.
Without professional safety equipment and experience, climbing up to replace the power supply yourself can easily lead to accidents.
Another example is when you’re unsure of the wiring configuration or operating procedures. LED screens have numerous power connectors, branch power lines, and control card wiring.
If the live and neutral wires are misplaced, the screen may not light up or even burn out the modules and control card.
Finally, if the power supply fails repeatedly, it’s recommended to consult a professional. Frequent power failures often aren’t just a problem with the power supply itself.
They could indicate a problem with the entire LED screen’s power supply or control system, requiring professional inspection to fully resolve.
In general, for large screens, high-altitude installations, complex wiring, or repeated faults, consulting a professional is not only safer but also avoids the embarrassing situation of the LED screen being “broken faster than it broke.”
7. Post-LED Screen Power Supply Inspections

After replacing the LED screen power supply, don’t rush to call it a day. The final inspection is crucial to avoid minor issues that could lead to major problems.
First, the most intuitive thing to check is whether the screen lights up successfully. After powering on the screen, observe whether the entire screen lights up and whether there’s flickering or uneven brightness.
Even if the screen lights up, if the brightness of a particular module is dim or flickering, it could be due to loose wiring or unstable power output, requiring prompt adjustment.
Second, pay attention to the condition of the power supply itself. Feel the power supply for unusual heat and listen for any strange humming or noises.
These are signs of abnormal power supply load or internal faults. If any abnormalities are detected, do not force them; first, disconnect the power supply and troubleshoot.
Next, check the mounting and wiring. Check that the power supply is securely fastened to the bracket and that the cables are neatly arranged and not pulled or compressed.
A loose power supply or tangled cables not only affects the appearance but can also cause short circuits or poor connections.
In short, checking the power supply after replacing it is like giving your LED screen a “physical examination”: check whether the screen is lighting up.
Whether the brightness is even, whether the power supply is functioning properly, and whether the installation is secure. Don’t overlook any of these to ensure long-term stable operation.
8. Conclusión
Does this article give you a clearer understanding of replacing the power supply for an LED display?
Whether you do it yourself or seek professional assistance, the key is to ensure safe and correct operation.
We hope this information will help you better handle screen problems and restore your LED display to its former glory.
Por último, para obtener más información sobre las pantallas LED, Por favor póngase en contacto con nosotros.
You may be interested in the video on how to repair LED modules:
